Toolbar
Note: to show or hide the toolbar, check or uncheck Toolbar in the View drop-down menu.
The toolbar is available at the top of the main window. It gives quick access to the following actions and settings:
|
|
Opens the Open window to load a file. |
|
|
Saves the file currently open in the active tab, or opens the Save As window if the file has never been saved before. |
|
|
Opens the Login window. |
|
|
Logs out the current user. |
|
|
Opens the standard print window to print the contents of the active tab (Member List or Optimised). |
|
|
Opens the Materials List window. |
|
|
Optimise All: runs the optimisation of all members in the Member List tab. Note: if there are already some partially or completely cut members (indicated by a quantity greater than "0" in the Done column), a dialog box will pop up. Choose whether you want to optimise all the members or only the uncut members. |
|
|
Optimise Selected: runs the optimisation of the members that have been selected in the Member List tab. Note: if there are already some partially or completely cut members (indicated by a quantity greater than "0" in the Done column), a dialog box will pop up. Choose whether you want to optimise all the selected members or only the selected uncut members. |


|
|
Optimise On-the-fly Selected: commands the saw to cut the members that have been selected in the Member List tab out of unknown lengths of timber that can be randomly fed into the saw. This function is great for consuming long and varying length offcuts. Select the members you wish to cut, then click this button and press the green START button on the operator console to start cutting. The saw will dynamically measure each new length of timber that is fed, run an optimisation process on the members remaining to be cut for that length (much like normal optimisation) and proceed to cut all the members it can out of that board with the least waste possible. Notes:All the selected members must have the same width and thickness for this function to operate. Same timber grade is also recommended.If there are already some partially or completely cut members (indicated by a quantity greater than "0" in the Done column), a dialog box will pop up. Choose whether you want to optimise on-the-fly all the selected members or only the selected uncut members.The operator will be prompted to enter the number of the bunk to pick the timbers from with the WoodRunner |

|
|
Cut All Uncut: commands the saw to cut all uncut members in the active tab (Member List or Optimised). Click this button and then press the green START button on the operator console to start cutting. As cutting progresses down the list, the saw will skip over any members that have already been cut. Note: Already cut members are indicated by a quantity greater than "0" in the Done column of the Member List tab, or tagged with an asterisk in the left-most column of the Optimised tab. |
|
|
Cut Selected Uncut: commands the saw to cut the uncut members that have been selected in the active tab (Member List or Optimised), or any member selected in the Member Tree tab. Select the members you wish to cut, then click this button and press the green START button on the operator console to start cutting. Note: in the Optimised tab, all members in the same stick must be selected for this function to work properly (i.e. the first selected member must be a stock material line and all members included in that material must be selected). |
|
|
Cut Remaining Uncut: commands the saw to cut the uncut members from the member selected in the active tab (Member List or Optimised). Select the member you wish to start from, then click this button and press the green START button on the operator console to start cutting. The saw will work its way down the list from this point. Note: in the Optimised tab, the selected member must be the only one or the first one in a stick for this function to work properly (i.e. it must be a stock material line). |


|
|
Makes Simple stop sending commands to the saw. Note: The saw will complete the execution of the last command sent and will then stop. A new cutting sequence will have to be sent to restart the saw. |

|
|
Set All To Uncut: sets to uncut status all members in the active tab (Member List or Optimised). |
|
|
Set Selected To Uncut: sets to uncut status the members that have been selected in the active tab (Member List or Optimised). |
|
|
Set Selected To Cut: sets to cut status the members that have been selected in the active tab (Member List or Optimised). |


|
|
Indicates that the follower is currently disabled. |
|
Indicates that the follower is currently enabled. |
|
Note: After turning the follower on or off, you need to wait for the status display window to disappear then rehome the saw. |
|||
|
|
Indicates that the Long Lead feature is currently disabled. |
|
Indicates that the Long Lead feature is currently enabled. |
|
Note: The Long Lead feature moves all cuts |
|||
|
|
Indicates that the Automatic Infeed Table is currently disabled. |
|
Indicates that the Automatic Infeed Table is currently enabled. |
|
|
Indicates that long pieces of waste (after all members in the stick are cut) are currently sent to the outfeed. |
|
Indicates that long pieces of waste (after all members in the stick are cut) are currently sent back out to the infeed. |
|
|
Indicates that the automatic Job Sequencing feature is currently disabled. |
|
Indicates that the automatic Job Sequencing feature is currently enabled. |
|
Note: The Job Sequencing feature enables the saw to automatically start cutting the optimised list in the job file tab to the right of the current job file, when and only when the last member in the optimised list of the current job file has been cut. With this feature enabled, the current job file tab will be coloured in green and the job file tab to be cut next will be coloured in yellow. When the current job file is finished, a pop-up will notify the operator the new job file has started and the colour of the tabs will also change automatically. The order of the non-active job file tabs (yellow or grey) can be changed at any time during cutting by clicking and dragging ahead or behind other tabs. The inactive job files can even be re-optimised while cutting the active one. |
|||
|
|
Indicates that the Stak-n-Gap is currently disabled. |
|
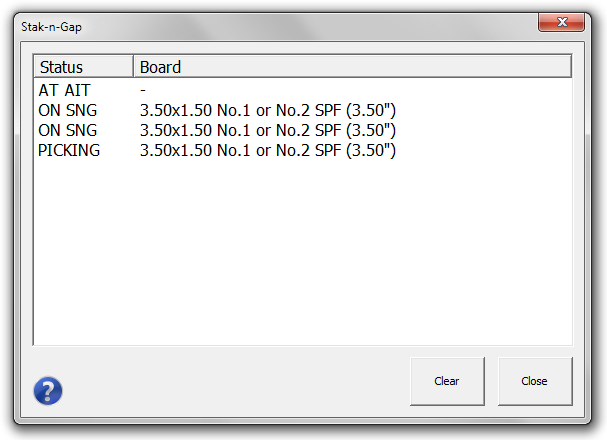
Indicates that the Stak-n-Gap is currently enabled. |
|
Note: to open the Stak-n-Gap interface, select Stak-n-Gap... from the Tools drop-down menu in the Simple menu bar. |
|||


|
|
Opens the Options window. |
|
|
Opens Vekta Rescue in the web browser. |

